Repack Super Hacks
- Shelby
- Jun 26, 2024
- 3 min read
Updated: Jun 27, 2024
One thing that might not be fully appreciated about these ultralight thru hikers, is that in the pursuit of eliminating all excess weight, nearly everything is repackaged into very light packaging that can go into the pack without 1) leaking, 2) taking up too much space, or 3) weighing too much.
Every day, Jamie is using 2 tablespoons of olive oil in the meals to boost calories, fat, and flavor. He's NOT carrying a big bottle of Bertolli in his pack.
Every week, he needs 1 ounce of Picaridin, 2 ounces of sunscreen, enough toothpaste to brush twice a day, and 1/4 ounce each of Aquaphor and deodorant. He is definitely not carrying all those individual bottles, jars or whatever.
Every resupply, he needs Leukotape for blister management and Advil, electrolyte tabs, and fish oil to keep the "physical plant" going strong. Everything gets repackaged.
Some of these re-packagings are straightforward. Advil and supplements are easy - count them out and put them in a baggie. But, man... You can go through a LOT of baggies. And even if you use the snack size, there is just so much empty space. Plus, who doesn't appreciate smart, right-sized packaging?
Which leads me to:
Repack Hack #1: You can use a FoodSaver sealer with regular ziplock baggies to customize the size. (Just make sure the ziplock is closed when you heat seal so the ziplock is aligned properly.)
Dealing with liquids is a bit trickier! During the Appalachian Trail, we had an unfortunate repackaging failure with the olive oil. I've always used the FoodSaver to seal the olive oil in those sturdy plastic bags. When Jamie gets that, he transfers the oil into a small leakproof Nalgene bottle. I really did think the FoodSaver bag was enough. Until it wasn't.
Olive oil, all over everything in a resupply, is a BIG mess. Definitely want to avoid this. So...
Repack Hack #2: Double seal and double bag liquids. Every time. Trust me.
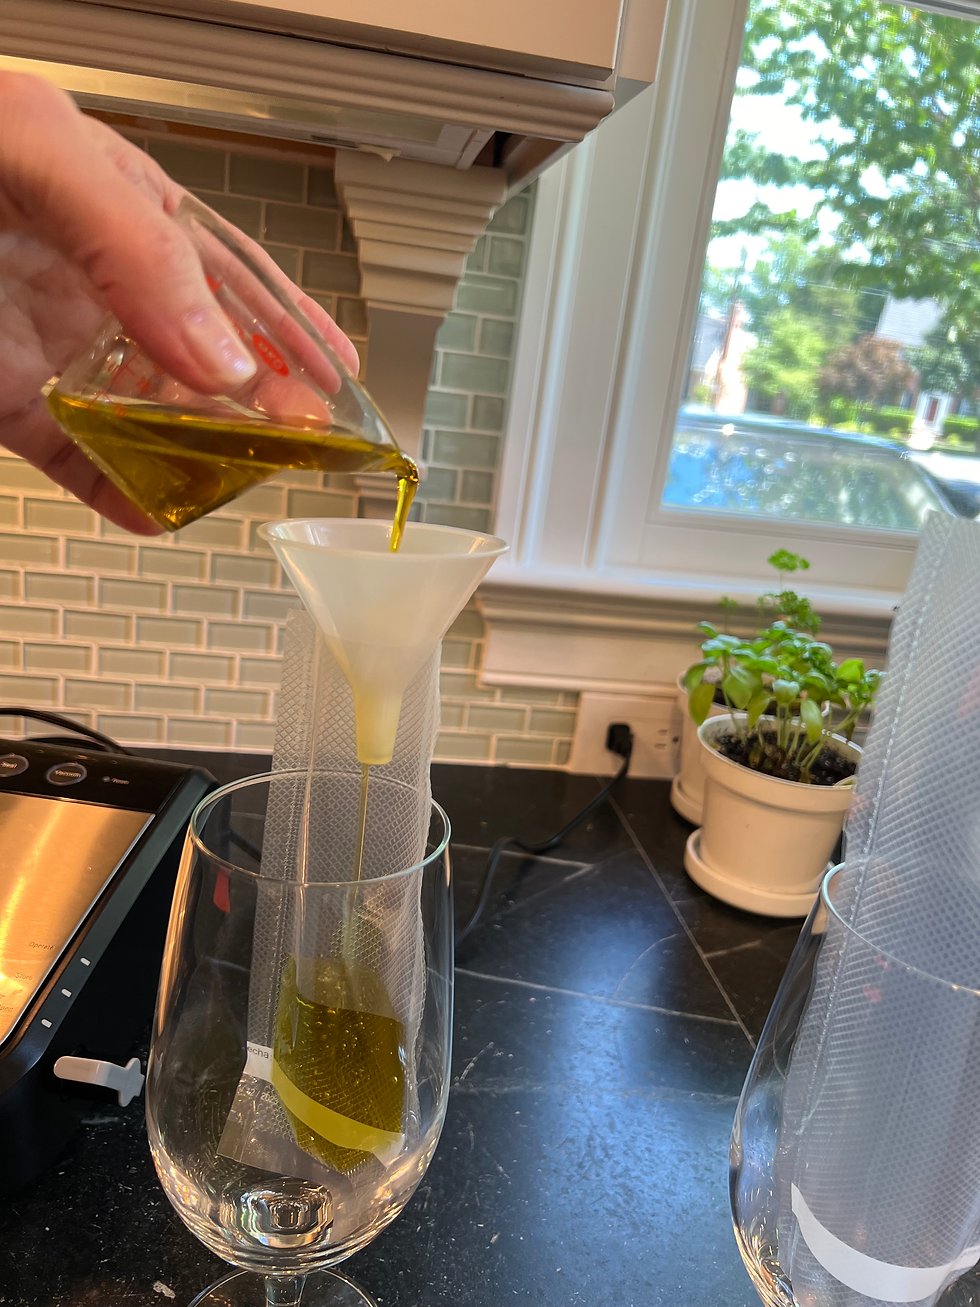
That's all pretty easy. Maybe a little practice helps to get the oil cleanly into a bag and seal it, but it's easy enough with a measuring cup with a pour spout, but I do have a tip for filling multiple bags at a time.
Repack Hack #3: Use glasses to hold empty bags with stability when you are pouring the oil or other liquid.
But... creams and gels have more challenges.
First, getting the stuff out of the original packaging without wasting a bunch of it is key. The packaging "almost" seems like it's designed for waste! Rigid plastic that can't be squeezed flat. Small openings that can't be scraped out.
So here in my best "mom voice" I ask:
"Would you throw $2.50 in the trash and be okay with that? No, you wouldn't. So why would you throw away $2.50 worth of product away?"
When you're paying $10 for 4 ounces (or more!!), you don't leave 1/4 of that in the bottle!
But how?
Repack Hack #4: Use tools like an Exacto knife, crab pick and/or small spatula cut the bottle open and get every thing out.
This kind of tube packaging has a very narrow opening, so it always leaves a lot behind. But if I wasn't going to throw away $2.50 of Picaridin, I'm sure not going to waste $4.35 on sunscreen!
Luckily, I came across a great idea on Instagram for getting everything out. Check it out!
So now that you have all the goo out of the tube, what are you supposed to do with it? The trick is finding a good way to get the goo into a small resealable pouch that is also convenient to transfer to another container.
And just like there is a "right tool for the job" there is also a "right package for the goo" too! You need the right shape, size, closure, etc.
Now, for most of these small 2 ounce or less creams and gels, we've found that the little pill pouches you can get at a pharmacy or online are perfect. They're a little more secure than my little homemade ziplocks, so for creams and gels, they're best.
But getting the goo into the tiny little bags cleanly is nearly impossible, even using the right tools and whatnot. But, here's a tip:
Repack Hack #5: These disposable piping bags for decorating cookies and cupcakes are great for getting the goo into a small ziplock pouch.
These are thin and flexible, so they're easier to use than the thicker ones you might normally use for icing cupcakes. And if you're filling multiple pouches, it makes it super easy.
Plus, at only $6.99 for 200 bags, the convenience is worth 3.4 cents for sure!
Then, when you decide to make some fancy cookies for your hiker, you'll be all set!


Seriously, did you make those hiker cookies!!? Beautiful.
Those cookies, though!!!
Great tips - even for 'regular' travel experiences when you're trying to pack lightly with hair, makeup, and other lotions!
Great video!